教學要怎麼建立自己的 hugo 靜態網站 + github.io
如何建立 hugo 個人靜態網站

Hugo installation
由於我個人是屬於 Mac 使用者,所以就跟 window 使用者說抱歉了~ 😲
檢查
執行hugo --version,如果有出現版本,代表成功安裝。
Create local file
1
|
hugo new site myWebsite
|
你會看到資料夾內多了myWebsite的檔案
 1
 2
 3
 4
 5
 6
 7
 8
 9
10
11
|
/
├── archetypes
├── assets
├── content
├── data
├── layouts
├── resources
├── static
├── public
├── themes
├── hugo.html
|
☝️ 架構與作用會類似長得像這樣 ☝️
每個資料夾大致作用
archetypes - 默認的文件,Hugo 會根據這裡的模型來生成內容assets - hugo 資源文件,像是 scss/sass,typescript 等,hugo 會將他們編譯成靜態資源content - 網站的內容頁面,也就是你的文章。data - 網站會需要的數據,像是 json,yaml,tomllayouts - hugo 模板文件,決定內容如何編譯成 html,像是你的首頁resoutces - hugo 處理後的資源文件static - 靜態文件圖片,會直接複製到 publicpublic - hugo 生成的整個網站輸出目錄。 github.io 就要存放在這裡theme - 主題hugo.html - website 設定檔
簡單來說,hugo 根據content and data 生成頁面,layout控制渲染,assets and resources處理資源,public輸出文件目錄。
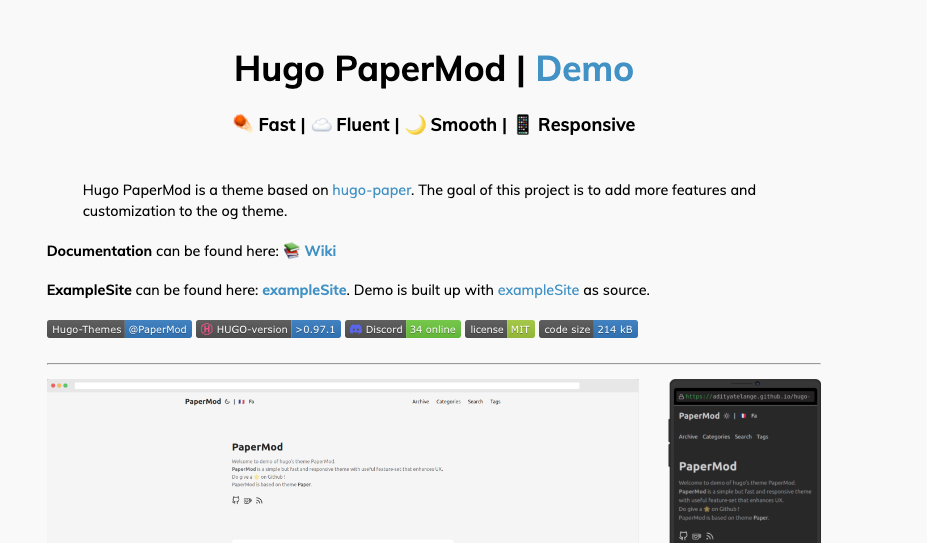
Theme
hugo 本身有建立許多主題的分享
我個人是會把主題的作者附在個人的網站上,尊重每個創作者!
可以從這裡下載 - hugo theme
 hugo theme
點擊喜歡的主題後你會看到有 Download
大部分的主題也都會有 Demo,挑自己喜歡的就可以了。
demo
點擊demo的超連結就可以了
通常每個主題內部都會在教學如何安裝,可能會有些許不同。
如果有遇到問題可以到該主題的 github 觀看!
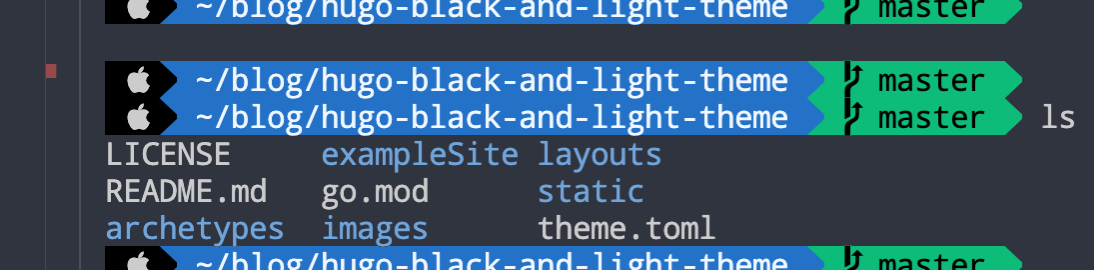
在你下載的主題之中會有exampleSite,把他複製下來貼到有go.mod那一頁。
go.mod
或是你可以直接把你需要的exampleSite/content, static等出來讓模板渲染他,這些都只是範例但你可以依照自己想法去慢慢編輯。
* (畢竟刪除比加法簡單)
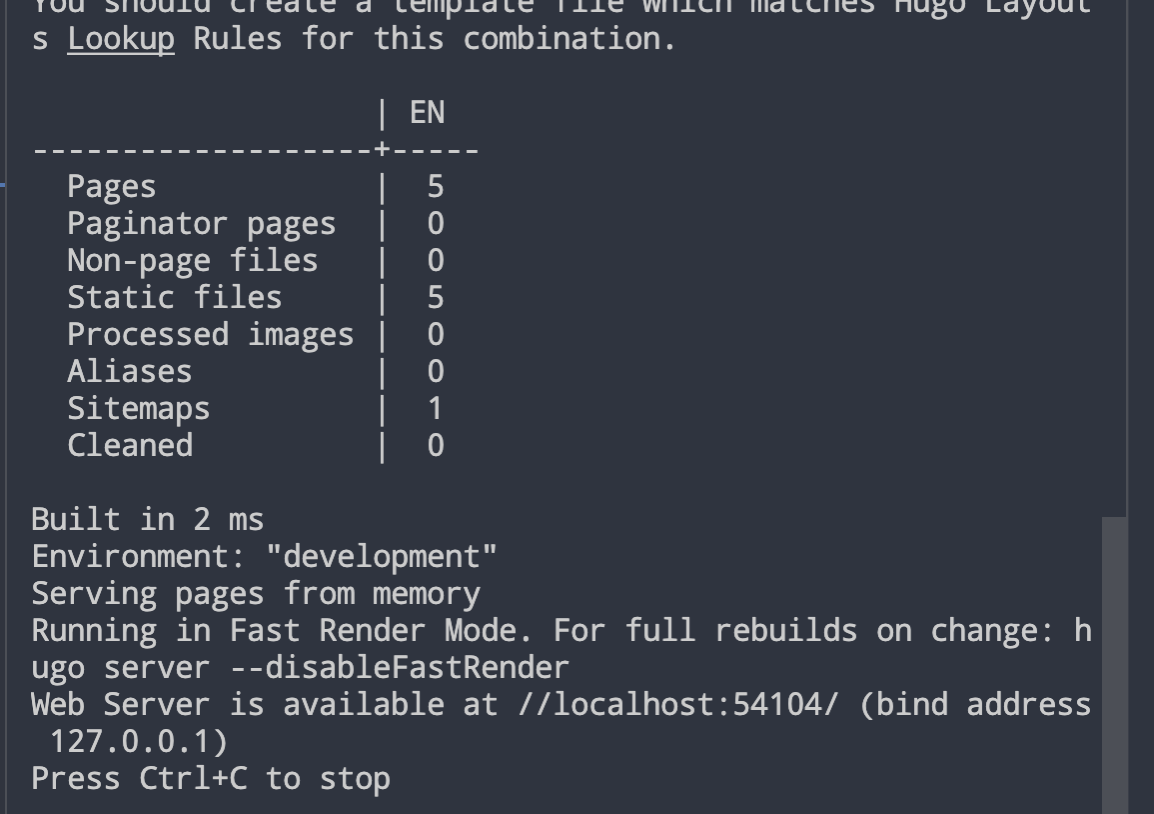
開啟 local server
接下來你可以在有go.mod那一頁執行
hugo server
這邊的localhost:54104 可以直接按者Ctrl+左鍵點擊他
就可以看到妳美美的網站了!
再去你的設定檔以及content/posts內部慢慢上傳貼文了~
發佈到 github
首先我個人會在 github 建立兩個 repo,一個存放靜態網頁,一個存放自己的文件內容。
先假設你是在~/中執行,
1
2
3
|
# 創立兩個資料夾
mkdir myWebsite # 這邊會存放有著go.mod的內容 也就是上方做的資料
mkdir public # 這邊把靜態檔案跟主檔案切開
|
- Step 1 - 在 github 上建立兩個 repo,一個叫做 myWebsite(這邊沒有特別指定名稱),第二個必須要叫做
github帳號.github.io,github Page 才會讀取你的靜態網頁。
- Step 2 - 在有 go.mod 的專案底下
1
2
3
4
5
6
7
|
cd ~/myWebsite

git init
git remote add origin https://github.com/帳號/網站專案名稱
git add .
git commit -m 'create project'
git push origin main
|
1
2
3
4
5
6
|
cd ~/public
git init
git remote add origin https://github.com/帳號/帳號.github.io
git add .
git commit -m 'create github page'
git push origin main
|
- Step 4 - 再回到有 go.mod 的頁面
建立一個捷徑到你的 myWebsite
1
2
|
#複製你的public絕對路徑  以我的mac舉例
ln -s /home/user/public /home/user/myWebsite
|
- Step 5 - 回到 myWebsite 後執行
hugo
1
2
3
4
5
6
7
8
9
|
cd ~/myWebsite;
hugo; # 這時會建立靜態檔案到public裡

#回到public push 到github就完成了

cd ~/public
git add .
git ci -m 'add static website'
git push origin main
|
恭喜你完成部署自己的網站!
再來就到https://帳號.github.io就可以看到你的個人網站了
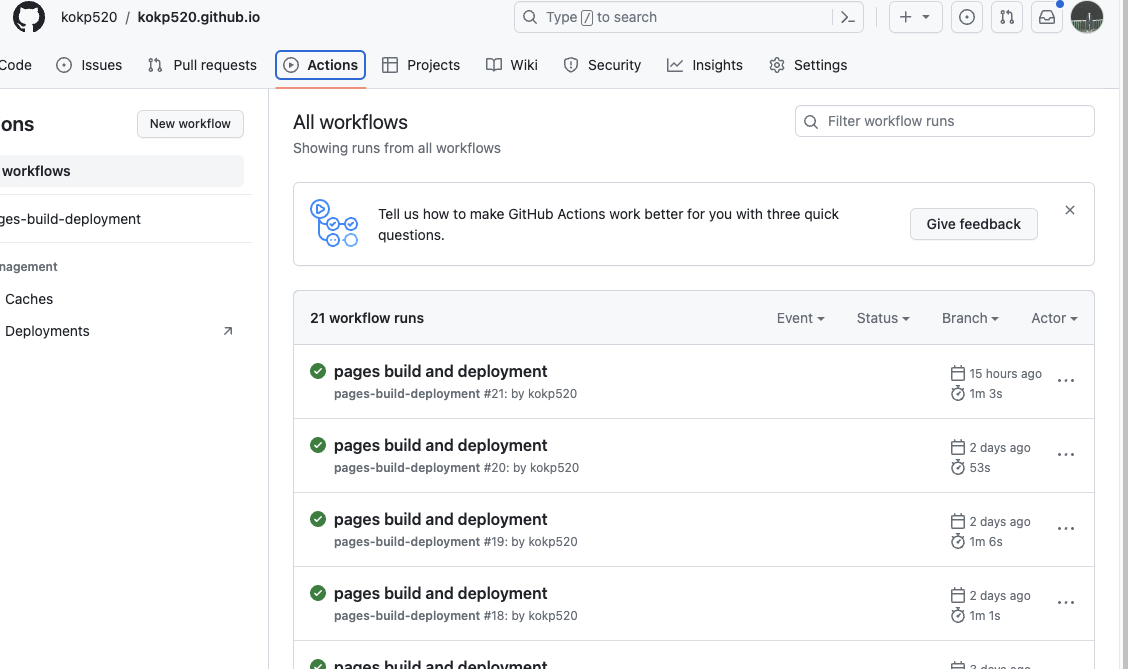
部署會需要一些時間,想知道 CI/CD 發生什麼事,可以到 github.io 的 repo 點擊 action 就可以看到
action.png
建立貼文
有人問我說要怎麼創建貼文,只要到你的myWebsite/content/posts/創建 postName/index.md
hackMD
md 是什麼?
這已經不是本文章的內容了在這邊分享一些連結 😆
Markdown 語法大全
hackmd
hackmd 練習
👆 可以在這邊創建帳號,就可以直接寫 markdown 且執行展示給你看!
另外分享個執行部屬的腳本
 1
 2
 3
 4
 5
 6
 7
 8
 9
10
11
12
13
14
15
16
17
18
19
20
21
22
23
24
25
26
27
28
29
30
31
32
33
34
35
36
37
38
39
40
41
42
43
44
45
46
47
48
49
50
51
52
53
54
55
56
57
58
59
60
61
62
63
64
65
66
67
68
69
70
71
72
73
74
75
76
77
78
79
80
81
82
83
84
85
|
package main

import (
	"fmt"
	"os"
	"os/exec"
	"path/filepath"
)

func main() {
    // 設定 Hugo 專案目錄的路徑
    hugoProjectPath := "你的public的絕對路徑"

    hugoPath := "有go.mod的那個repo路徑"

    	// ----- website content -----

	// 執行 Git 命令
	if err := executeCommands(hugoPath, "git", "add", "."); err != nil {
		fmt.Println("Git add 失敗:", err)
		return
	}

	if err := executeCommands(hugoPath, "git", "commit", "-m", "update new post"); err != nil {
		fmt.Println("Git commit 失敗:", err)
		return
	}

	if err := executeCommands(hugoPath, "git", "push"); err != nil {
		fmt.Println("Git push 失敗:", err)
		return
	}

	fmt.Println("hugo path完成!")

	// ---- public -----

    // 執行 Hugo 命令
    if err := executeCommand(hugoPath, "hugo"); err != nil {
        fmt.Println("Hugo 執行失敗:", err)
        return
    }

    // 執行 Git 命令
    if err := executeCommands(hugoProjectPath, "git", "add", "."); err != nil {
        fmt.Println("Git add 失敗:", err)
        return
    }

    if err := executeCommands(hugoProjectPath, "git", "commit", "-m", "update"); err != nil {
        fmt.Println("Git commit 失敗:", err)
        return
    }

    if err := executeCommands(hugoProjectPath, "git", "push"); err != nil {
        fmt.Println("Git push 失敗:", err)
        return
    }

    fmt.Println("完成!")
}

func executeCommand(dir, command string, args ...string) error {
    cmd := exec.Command(command, args...)
    cmd.Dir = dir
    cmd.Stdout = os.Stdout
    cmd.Stderr = os.Stderr
    return cmd.Run()
}

func executeCommands(dir, command string, args ...string) error {
    cmd := exec.Command(command, args...)
    cmd.Dir = dir
    cmd.Stdout = os.Stdout
    cmd.Stderr = os.Stderr
    return cmd.Run()
}

func getAbsolutePath(relativePath string) (string, error) {
    absPath, err := filepath.Abs(relativePath)
    if err != nil {
        return "", err
    }
    return absPath, nil
}
|
執行方法
1
2
|
# 我個人是放在有go.mod的那個目錄創建bin資料夾,把上面的code放在裡面
go run bin/cicd_script.go
|
就可以瞜!
調整網頁細項